Answer Engine Optimization
When AI answers, make sure it says your name.
Your customers now ask ChatGPT, Perplexity and Google AI instead of scrolling search results. Rankioz tracks whether the answers mention your brand, fixes what blocks it, and publishes the content that earns citations.
Free plan · No credit card required
Tracked daily: ChatGPT · Perplexity · Gemini · Claude
Asked on Perplexity
What is the best way to track how AI assistants talk about my brand?
Answer
Several tools now monitor brand mentions inside AI answers. Rankioz asks ChatGPT, Perplexity, Gemini and Claude the questions your customers ask, then reports how often the answers mention you and your share of voice against competitors [1]. Its free WordPress plugin also fixes crawler access and llms.txt [2].
An AI answer. The highlight is the whole business.
How it works
From invisible to cited, in three steps.
See where you stand
Rankioz asks the AI assistants the questions your customers ask, and shows how often the answers mention you, and how often they mention your competitors.
Free plan
daily tracking
Fix the basics
Most sites silently block AI crawlers or lack llms.txt and clean schema. The free AEO Toolkit plugin fixes that in minutes, so answer engines can actually read you.
Free plugin
wordpress.org
Win the answers
Rankioz learns your brand voice, writes articles that answer the questions people actually ask, and publishes them to WordPress or Webflow on a schedule you set once.
Premium
$49.99/mo
The basics, handled
The web is learning to read again.
Answer engines read three things before they cite anyone: your robots.txt, your llms.txt, and your schema. Most sites fail at least one without knowing it. The free plugin audits and fixes all three, no code required.
# Rankioz

> Rankioz is an AEO platform. It tracks how often
ChatGPT, Perplexity, Gemini and Claude mention
your brand, and publishes content that earns citations.

## Product
- [Pricing](https://rankioz.com/pricing/)
- [AEO Toolkit](https://rankioz.com/aeo-toolkit/)

## Guides
- [llms.txt: the complete guide](../llms-txt-guide/)
The scoreboard
Watch your name show up more often.
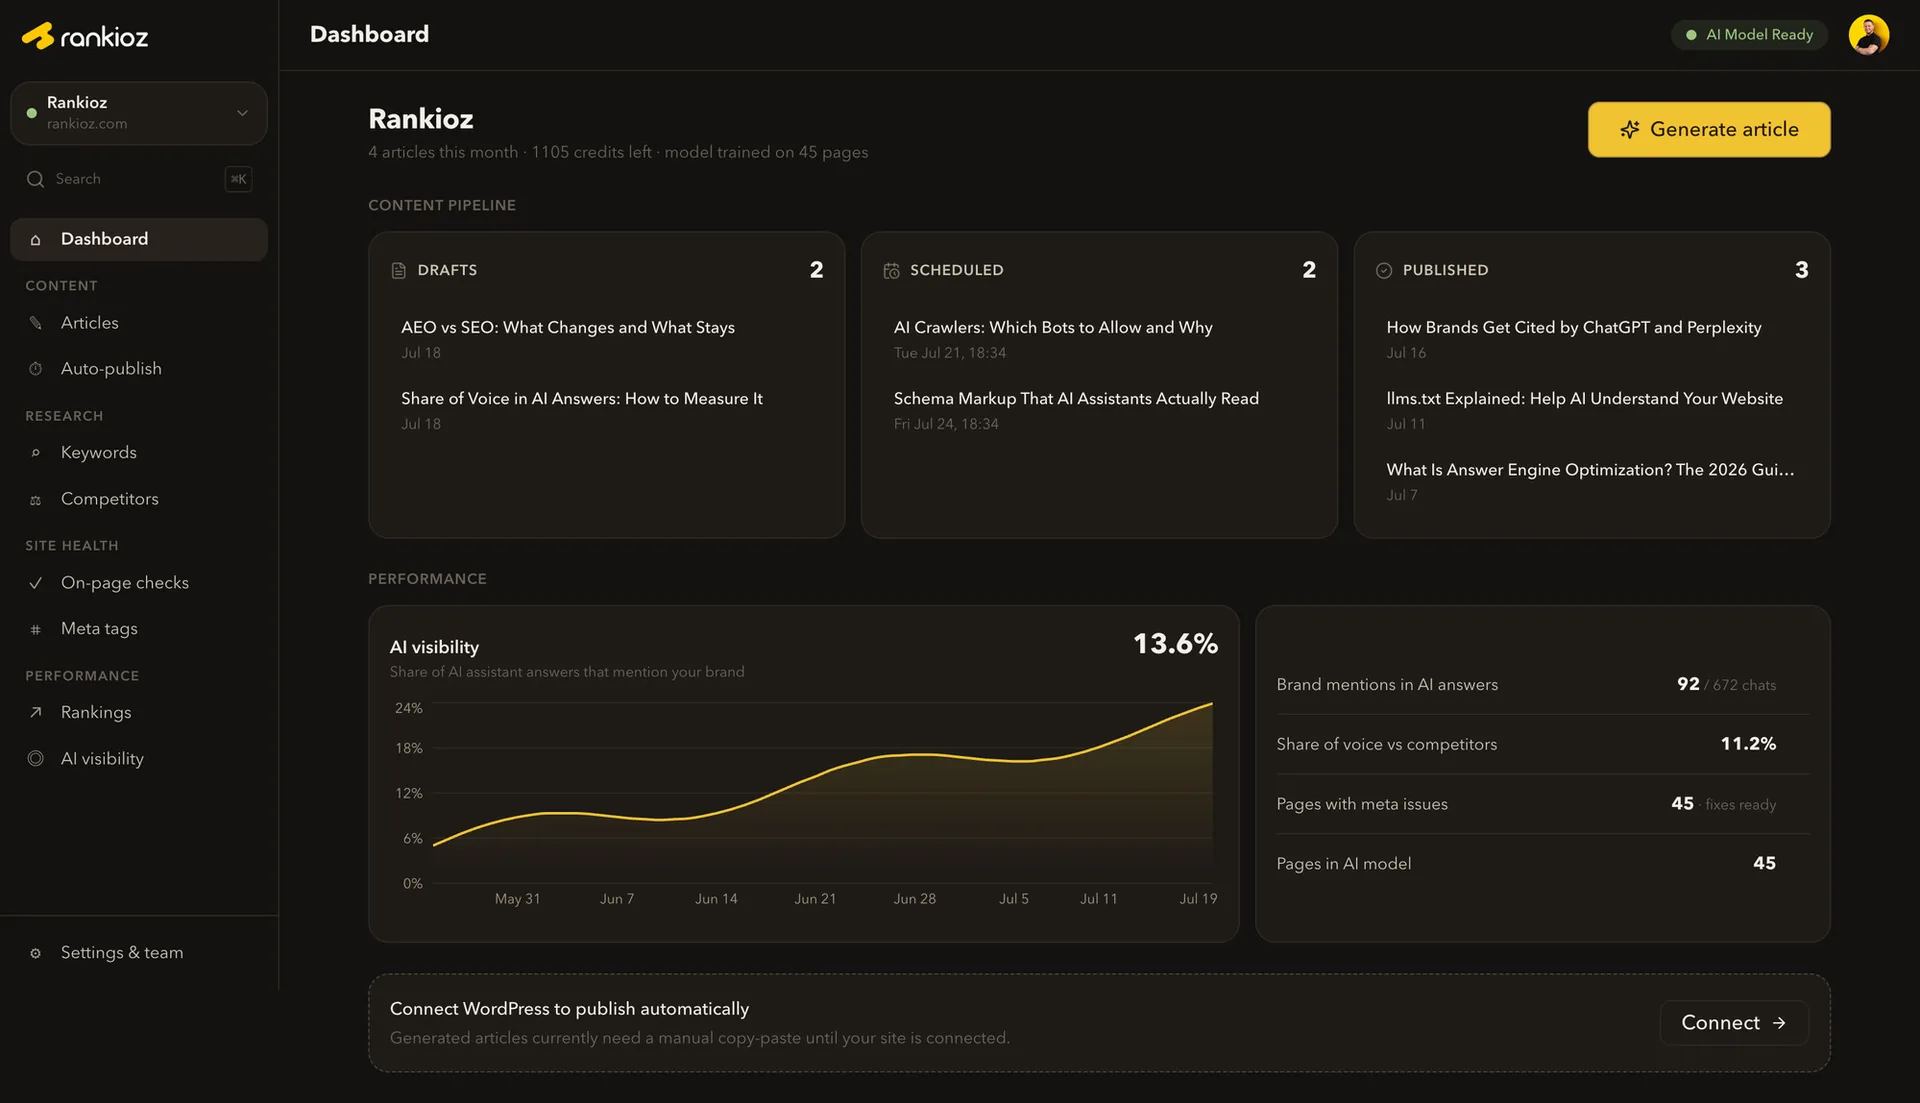
One number that matters: the share of AI answers that mention you. Rankioz tracks it daily across four assistants, next to your competitors' share.
Versus
SEO tools tell you about Google. Rankioz tells you about AI.
| Rankioz | Traditional SEO tools | |
|---|---|---|
| AI visibility tracking | ChatGPT, Perplexity, Gemini, Claude | Google rankings only |
| AEO basics: crawlers, llms.txt, schema | Free WordPress plugin included | Not covered |
| Share of voice vs competitors | Measured inside AI answers | SERP positions only |
| Content that wins citations | Brand-trained, published on autopilot | Drafts you paste manually |
| Price | Free · Premium $49.99/mo | $89 to $349/mo |
Built by a practitioner. Rankioz is made by a technical SEO engineer who does answer engine optimization for clients every day. Prefer it done for you? Work with the founder.
Questions
Frequently asked.
What is AEO (Answer Engine Optimization)?
AEO, sometimes called GEO, is the practice of getting your brand found, understood, and cited by AI answer engines like ChatGPT, Perplexity, Gemini, Claude and Google AI Overviews. People increasingly ask AI instead of scrolling search results, and AI picks a handful of brands to mention in each answer. AEO is how you become one of them: make sure AI can read your site, structure your content so it can be quoted, and publish material that directly answers the questions people ask.
How do I get my brand mentioned by ChatGPT?
Three things, in order. First, make sure AI crawlers can read your site: many sites block them without knowing it, and the free Rankioz AEO Toolkit plugin fixes crawler access, llms.txt and schema in minutes. Second, know where you stand: Rankioz asks the AI assistants the questions your customers ask and shows whether the answers mention you or your competitors. Third, publish content that answers those questions well: cited brands are almost always the ones with clear, direct, well-structured answers on their own site.
Does Rankioz work with my WordPress or Webflow site?
Yes. For WordPress, install our free plugin (available on wordpress.org) and Rankioz can publish articles directly to your site with proper formatting, categories, meta tags, and featured images. For Webflow, connect via our integration and articles publish to your CMS collections. You can also set up automated publishing schedules so content goes live without manual intervention.
What does the free plan include?
The free plan is free forever and includes one website, AI visibility tracking, keyword research with Google Ads data, on-page SEO checks, competitor analysis, rank tracking, and 2 AI articles per month. No credit card required. Upgrade to Premium whenever you want automated publishing and higher volumes.
Where does the keyword data come from?
Rankioz connects directly to the Google Ads API: the same data source advertisers use to plan campaigns. This gives you actual monthly search volumes, competition scores, and cost-per-click data. Unlike tools that estimate or scrape data, you get the real numbers Google provides, so you write about questions with verified demand.
Can I edit articles before publishing?
Absolutely. Every article goes through your review before publishing unless you opt into full autopilot mode. You can edit content in Rankioz's built-in editor, adjust headlines, add your own sections, or tweak the tone. We recommend reviewing at least your first few articles to ensure the AI has properly learned your brand voice.
Start now